|
 |
Tutorial 2: "Fixing bugs of limited precision"
If you fly to the statue you will see that we have a problem, similar bug can be seen of landscape as well:

This is issue with shadow map or scene depth precision, both are saved into 16bit float point textures (shadow map
values are packed to get more precision), even if you use 32bit it will not eliminate such issue completely. We have
two way to solve this issue and solution will depend on where exactly we don't have enough precision.
To address issue with scene depth we need to tweak our Far and Near clipping plane values:
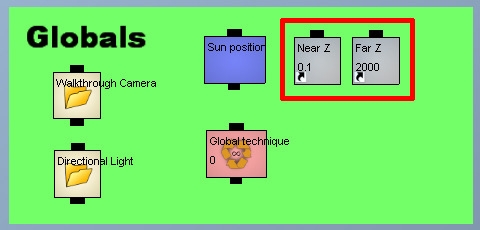
If you change "Near Z" value to 1 problem will be solved, this is because Near clipping plane effects precision of
depth distribution in much greater manner than Far clipping plane. There are several ways of how to deal with it.
First one, is to dynamically adjust your Near clipping plane value by height of camera. Rarely you will have a situation
when you need a very small Near clipping plane value when camera is flying above the project, it's needed only
when you have a possibility to stand close to some 3d object and part of the object will be clipped because of this.
You can adjust Far clipping plane value by camera height as well.
Another solution is to use linear depth everywhere in your shaders, this is a good solution for really huge scene with
a big visible distance (flight or space simulation, maybe very big real estate project). I won't show you how to do it in
this tutorial, but I have a link for very good article on subject:
http://www.mvps.org/directx/articles/linear_z/linearz.htm
To address shadow maps precision issue all what we need to do is to change shadow maps bias constants, these
values "virtually" shift surface of object during shadow map render, so later during comparison of distances to the
light source stored in shadow map and calculated for pixel visible in camera, we get rid of self shadowing bug.
I'll use "v13 With Monster and Nature Painter" example to show how to adjust depth bias.
1.
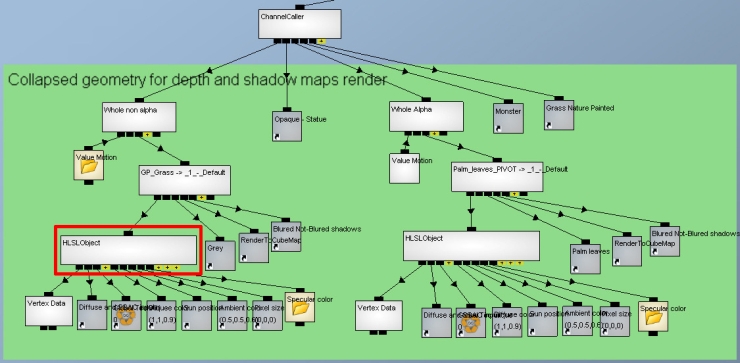
Open example and open this HLSL channel, it's located in "CSM example startgroup v2" channel group:
2.
Scroll down and locate this part of HLSL code:
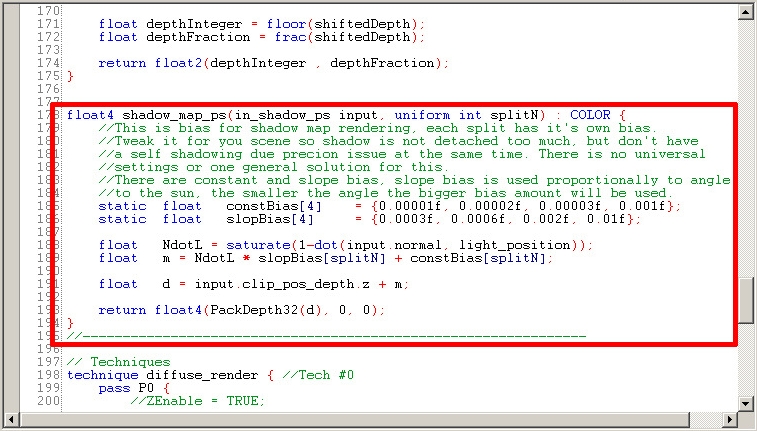
Four split planes is used in example, each split covers different portion of the scene seen by camera, each split has its
own shadow map and we need to tweak shadow maps bias for each split separately. Each set of biases consist of
two values: constant bias, that is simply added to surface's depth and slope bias amount of which is taken into with
respect to angle between surface normal and shadow map camera, surfaces with a steep angle need big bias values
to work correctly. This is a comparison screenshot from example, slop bias value on the right side is 20 times smaller
than on the left side:
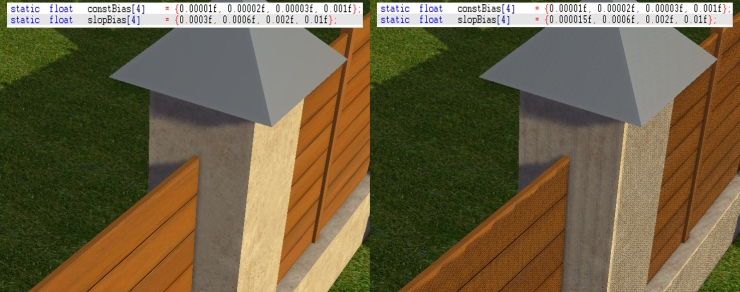
How much bias do you need is not possible to say for sure, there is no magic solution to this. You need to tweak it
and find one that works best for you. Too big bias value will detach shadows from shadow caster, too small will lead
to the false self shadowing result show on the right. Currently, depth distribution depends on the size of the scene's
bounding box. You can safely use the same bias values for all objects in your scene.
I would recommend to collapse your whole scene (or part) in modeling package into one object, import it and adjust
bias using such model, later when you found good bias values you can put them into final shaders.
NOTE: There are alternative solution with a better depth precision but with less efficient way of utilizing shadow
map texture space. Such solution would be beneficial for very big scenes with a big amount of small details. It can be
delivered to you on request, you can easily apply it without changing rendering pipeline, that is shown in Tutorial 1.
|
|
|
|
|
|